EM-Tec Checkerboard Calibration Standard for SEM imaging
EM-Tec MCS magnification calibration standards
EM-Tec SEM stub adapters
EM-Tec Checkerboard Calibration Standard for SEM imaging
quick and easy full image magnification calibration
EM-Tec Checkerboard Calibration Standard for SEM imaging
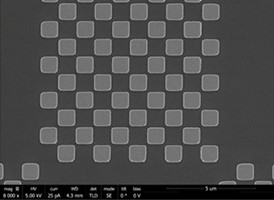
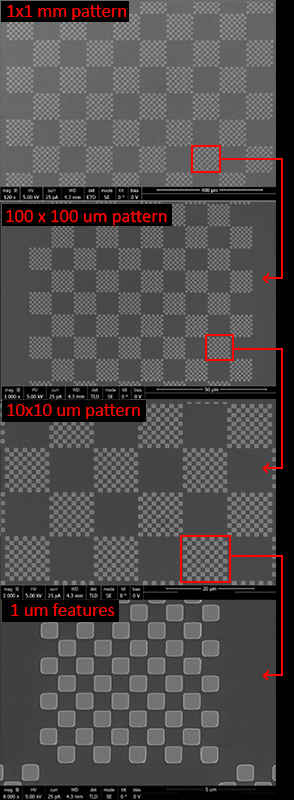
The EM-Tec Checkerboard calibration standard has been developed for quick and easy magnification and image calibration of SEMs and compact SEMs. It consists of over 1.6 million Squares which form 4 stages of checkerboard patterns. The smallest checkerboard is 10 x 10 um. These smallest checkerboards then form a pattern of 100 x 100 um and these again form checkerboards of 1 x 1 mm. The 1 x 1 mm checkerboards then form a 5 x 5 mm pattern.
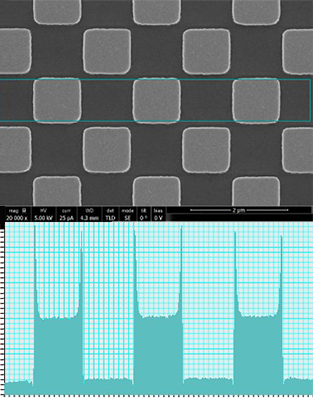
The smallest 1 x 1 um squares are made with 20nm thick Chromium and 40nm Gold on the Cr, deposited on an ultra-flat conductive Boron doped <100> silicon substrate. These materials are deemed inert under normal working conditions. Imaging contrast is good for both SE and BSE imaging, especially at lower keV. The EM-Tec Checkerboard calibration sample is suitable for SEM magnification calibration in the range of 20x to 50,000x with a pitch accuracy of ± 0.1% in both X and Y direction. Also useful for checking of image distortions and the accuracy of (motorized) SEM stages.
The EM-Tec Checkerboard calibration standard is NIST traceable. Example of wafer level certificate of traceability which is supplied with each EM-Tec Checkerboard calibration standard.
Features of the EM-Tec Checkerboard Calibration standard
- Quick and easy magnification calibration and image check
- Feature sizes: 1mm, 100um, 10um and 1 um
- Pitch accuracy ± 0.1% in X and Y directions
- Ideal for SEM and compact SEM
- Excellent contrast with SE and BSE, also at lower KeV
- NIST traceable
- Large 5 x 5 mm checkerboard
- Die size is 6 x 6 mm with a thickness of 675 um
- Substrate B-doped <100> silicon with 5-10 ohm-cm resistivity
- Pattern made with 40nm Gold over 20nm thick Chrome
- Long life construction with virtually inert materials
The EM-Tec EDX-Checkerboard calibration standard is available unmounted and mounted on popular SEM stubs.
 |
|
Ordering EM-Tec EDX-Checkerboard calibration standard
|
|||||||||||||||||||||||||||||||||||||


